How to Make a Photodocumentary Video (Enjay Teaching New Tech)
PORTFOLIO@ WORDHOUSE
More than just a slide show, a photodocumentary video is a moving collage of the best chapters of our lives, a digital scrapbook that captures family memories, celebrates friendships, and reflects personal journeys. Whether you want to preserve your story or explore a new hobby, our guide below walks you through the basic processes of creating your own photodocumentary video.
Paggawa ng Photodocumentary Video (Enjay Version)
This guide is Enjay’s Version because she actually went through all the steps herself. She learned as she fumbled over app instructions and navigated the digital learning curve. Everything is doable, but don’t ask her to solve your problems; if you hit a head-scratching, long-frowning puzzle, you will have to ask the app and trust the machine.
Enjay’s version reflects her friendly, ribbing guidance after walking the steps, stumbling often, and troubleshooting at her own slow pace. Happily, she didn’t spill her coffee on the PC, despite her curiosity and bad vision bringing her face closer and closer to the screen.
Where, When to Do this, & What you Need
You can do this anywhere, but your environment matters. If you are sensitive to noise, find a quiet corner or a cozy room. Pero, here’s my rule for seniors: Don’t isolate! Keep the door unlocked para madaling makapasok ang mga anak o apo kapag may iuutos ka o kung may ibibigay sila sa iyo.
Your Tools Checklist
Whether you use a laptop, desktop, or tablet, you need a view of letters and images that won’t make you squint.
A comfortable chair: Think of sitting for up to 3 hours; mind your back and neck!
Good lighting and a pleasant room temperature.
Kape at Tsaa: you’ll probably need a whole packet for a week-long adventure.
6-na-Araw na Trabaho
Di naman tayo nagmamadali, mapuwera na lang kung mabilis ka talagang gumawa. So let’s break this into small tasks.
Day 1: Gathering—Ilagay ang mga digital photos sa folders.
Day 2: Sorting—Pangalanan ang mga files para hindi malito.
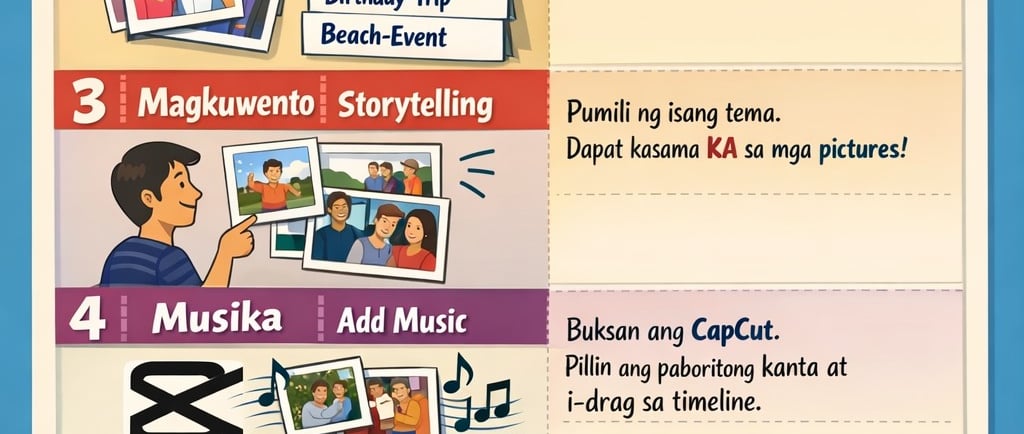
Day 3: Storytelling—Maghanap ng narrative thread o tema.
Day 4: Music—Lagyan ng background music gamit ang CapCut
Day 5: Editing—Ayusin ang timing at transitions.
Day 6: Posting—Ishare sa social media
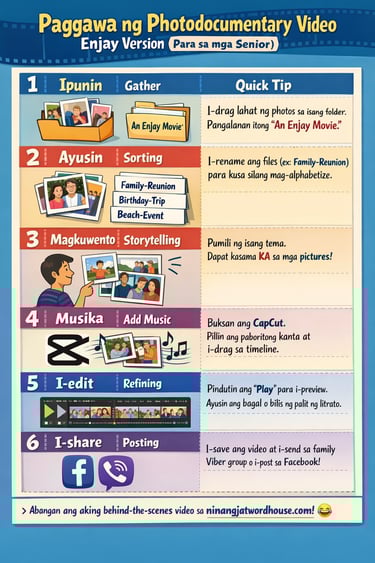
Step 1: Gathering Your Photos
If you don’t yet have a folder for your photos on your PC or smartphone, this is a simple filing task. In earlier days, we sorted our pictures by hand, arranging them in photo albums, our layouts shaped by our creative impulse and the size of the album sleeves. Today, we simply drag and drop images into a digital folder and give it a name.
Step 2: Sorting and Organizing
The task here is to rename the pictures. Most are labeled with numbers and a .jpg extension.
Pro Tip: If you have .png files, you can convert them to JPEG.
After you take your photos, they will usually be saved with numbers as file names. It helps to rename them according to who is in the photo and the event, for example: family–Christmas party, relatives–reunion, high school batch–New Year dinner, besties–lunch, and so on. This way, the photos automatically arrange themselves in alphabetical order. It will be easier for you now to find the images you want for your photodocumentary.
It’s also a good idea to label folders by project. After locating photos from your general files, move them into the right project folder for easier organization and quick access later. Example, ang label ko sa sariling photo video folder project ay “An Enjay Movie”.
Step 3: Thread a Story
What we are attempting is not a full documentary or an authoritative photoshoot, so you don’t need to include every photo from your childhood. Instead, pick a few “high” or “challenging” moments and find a narrative thread. For example, “When Life Gives You Tangerines,” “A Time of Us,” “Fashionable Through the Years,” “Why I Kept Wearing Denims,” or “Mom Look at My Hair!”
Remember, pictures do not lie about general themes. Even as wrinkles become more visible, your photographs reveal the habits and inclinations that remain consistent over time. You can also look for surprising reversals or unexpected moments in your collection. However silly it may seem, try to find the consistent story in your photos to create a meaningful narrative. Do you need to be in every picture? Yes, because this is a self-photodocumentary.
Step 4: Narrate with Music
Sa social media, “reels” ang tawag dito. Pick a song that fits your story. Start with your favorites, pero wag naman ubusin ang buong araw sa pagpili ng kanta. Give yourself some slack, you’re not racing to finish this (unless you’re obsessive-compulsive). Enjoy the music as part of the process.
Suggested Tool: We recommend using CapCut because it is free and senior-friendly.
Download: Get CapCut for Desktop or Mobile
Learn: Watch this CapCut Beginner Video Tutorial
In CapCut:
Click New Project → Add Photos → Add Music.
Preview: Hit the play button often.
Play: Drag sliders, try a "fade" transition, and watch what happens.
Don’t worry about getting the timing, duration, speed, or transitions exactly right. Just explore the app. Click on the photos, try a fade, drag a slider, and see what happens. The app is like a patient teacher: it shows you, you adjust, and voilà—you did it!
Step 6: Post, Share, and Celebrate
Export your video and show it to family and friends, or post it online. This is where you might start getting hooked on videography. You might even find yourself inspired to start a professional writing project or a new film hobby
As seniors, we finally have the time to explore these digital horizons. Who knows? At this age, we might even try making a short film. A stretch? Maybe. But in retirement, we have the time. Think about it.
If you want proof of Enjay finishing her photodocumentary (what a fancy long label) behind the scenes
Abangan ang video!
Warning: It is full of wrinkly-face chaos, accidental swaying, and sleeping on the job
For more updates on life writing, subscribe to our newsletter.